Hello again one and all,
An Update:
Our Suds Club campaign is off to a great start–hats off to those of you who have taken the plunge! Your support is truly essential and deeply appreciated! Those of you still thinking about it, feel free to get in touch with any questions or concerns. We know it's not something everyone can do at this point, and we have also had a number of inquires about sharing memberships. While we wholeheartedly encourage this activity, we just want to clarify that we will still only be able to honour one coupon per month–this just means that you will have to work out amongst yourselves how you'd like to share the coupons, either by taking turns redeeming them, or by making monthly dates to meet up for a tasty meal and libations, and putting the coupon toward a shared bill.
Attention non-beer drinkers:
While we will naturally be promoting excellent craft brewed draught beer at the brewpub, our own and a number of the Maritime's finest, we assure the less beer-inclined among you that there will also be an excellent little wine list, and some terrific ciders available as well. In fact, we'd love to hear what you think about having cider on tap (how many of you would actually order it?) and what you'd most like to see on our wine list! Comment on the blog or drop us a line!
And now, back to the main event...
The Great North Grant Pale Ale Session
Recently our friend Tom and I brewed a batch of English Pale Ale in Tom's cozy and rustic barn/personal brewery in North Grant. We thought some of you might like to see the process as it unfolded. This is a very basic description of the process, there are awful lot of very complicated chemical processes taking place, we'll just highlight the most rudimentary ones.
The brew started with 8 lbs of crushed malted barley–a combination of the traditional Bristish 2-Row Maris Otter pale malt and a medium Crystal malt, which gives it the lovely amber colour–ordered from the Noble Grape in Halifax and produced 20 L of finished beer. The amount of grain used per batch is a key factor in determining the specific gravity of your beer, which will allow you to achieve specific alcohol levels. Basically, the more grain/sugars the higher the alcohol content.
The Mash
The grain is then immersed in water at a controlled temperature in a vessel called the mash tun. This process is known as "mashing in," and this ale calls for a single step infusion process over 1 hour. The mash draws out enzymes in the cracked grain, converting starches into fermentable sugars.
 |
| Making sure there are no clumps, you stir the grains thoroughly. (This smells amazing!) |
 |
| Keepin on mashing! |
The Sparge
After one hour, more hot water is added to the top of the mash, effectively rinsing the last of the fermentable sugars from the grain bed. Enough water is added to bring the total quantity up to the desired pre-boil volume, in this case 6 gallons, or about 23 L. Tom's developed his own clever sparging technique where he bounces the water flow off the lid of the mash tun in order to distribute the flow of water across the grain bad evenly and avoid channeling.
 Spargie times |
 |
| Tom bringing up the volume |
 |
| Tom's patented lid technique |
The Boil
The next step is boiling the liquid, now full of sugars from the malted barley and tasting like a sort of sweet cereal water. While the liquid is boiling away, the hops are added. In addition to the types of malt used, the point in the boil at which hops are added, the variety of hops added, and in what quantity, are key factors in creating beers' distinct flavour profiles, including its taste, mouthfeel, and aroma. I used a combination of Fuggles, East Kent Golding, and, because the order came from Halifax an ounce short, I added one ounce of my own homegrown, whole leaf Cascade hops for aroma.
 |
| Boil kettle in landscape |
 |
| Tom scraping off some scuzzies |
 |
| First hop addition. 1 ounce fuggles |
 |
| Head in the clouds |
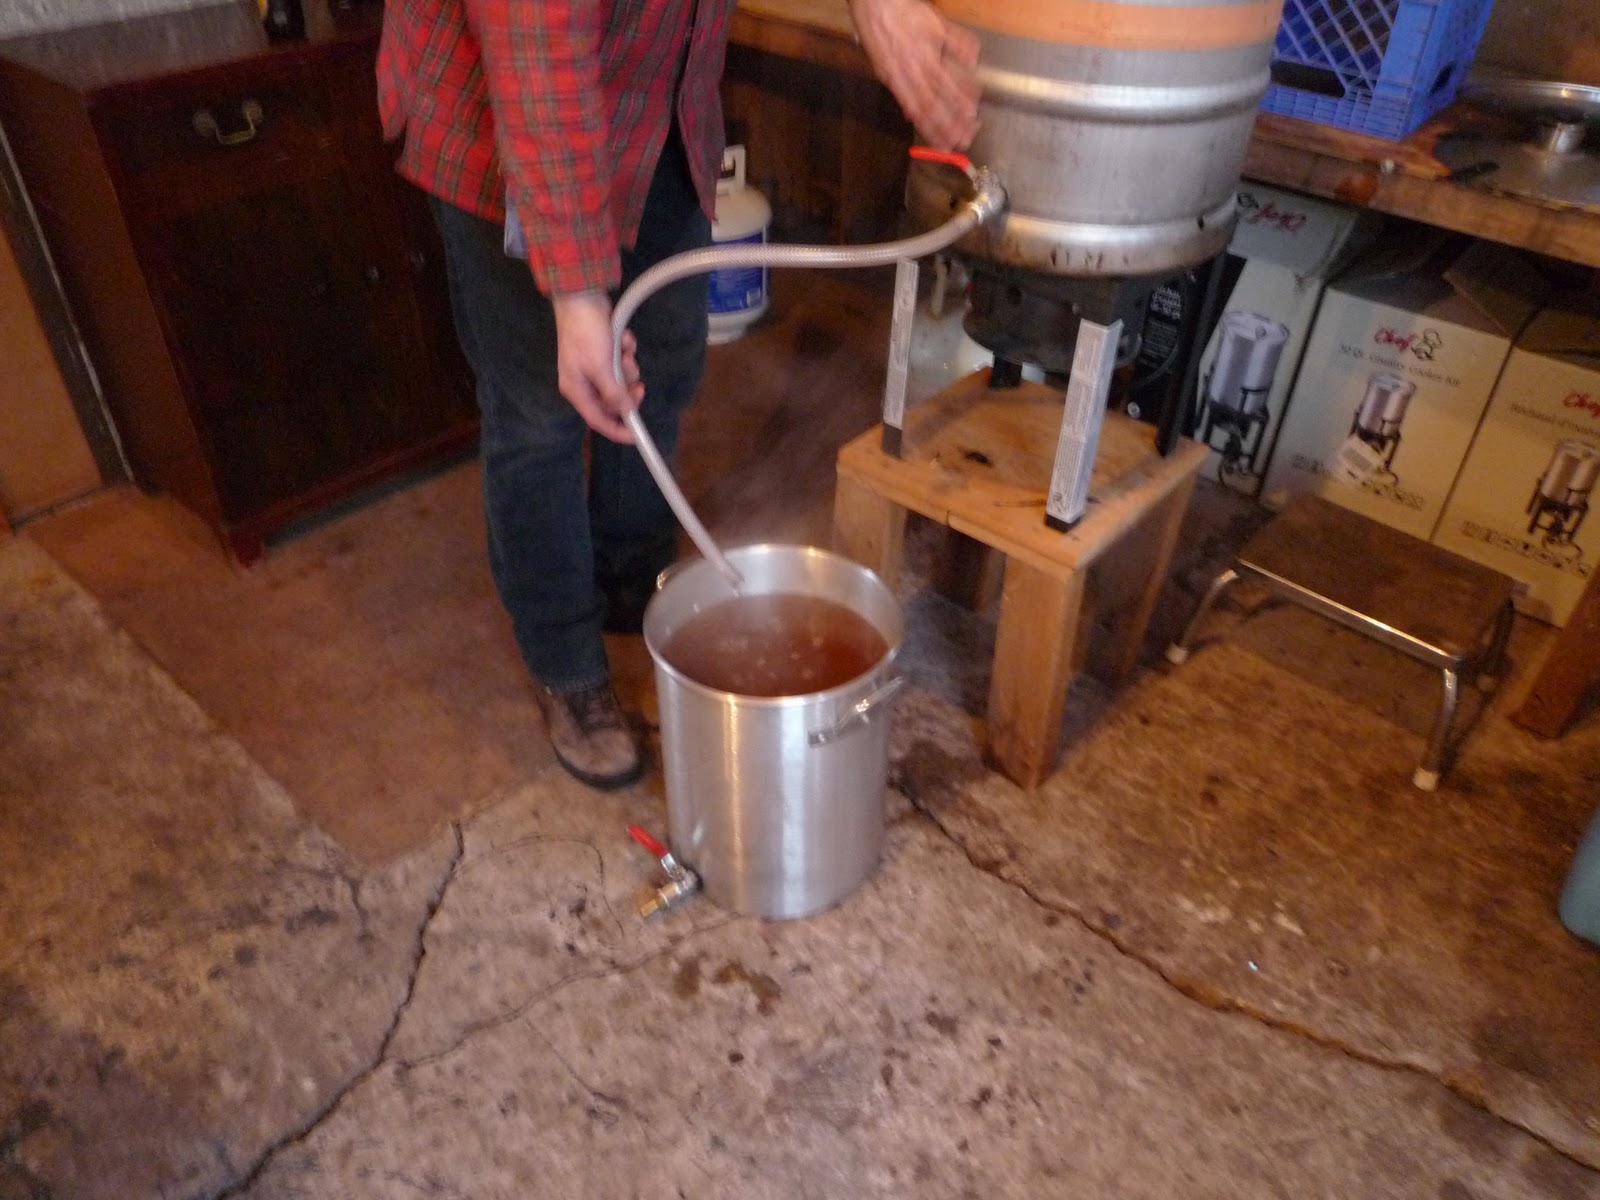
Post-boil/Fermentation
The boiled liquid, or "wort," is cooled to room temperature, and it's important to do this as quickly as possible, and transferred gently into another vessel for the fermentation. The next step is to "pitch" the yeast onto the wort. Over the next week or so, the yeast will eat the sugars and convert them to alcohol. Once the yeast has done it's job, it falls to the bottom of the of the vessel, along with other proteins, etc., creating a murky sludge at the bottom. After a couple of weeks it settles out. The clear, beery liquid then needs only to be kegged, chilled, carbonated, and then, of course, drunk!
We'll let you know how this batch turns out! If anyone would be interest in being part of a Townhouse sponsored home-brewing club, please get in touch. There is an opportunity here to start bringing in all grain supplies and equipment, sharing recipes and experiences, having tasting sessions, etc.
Cheers,
Terry
Exciting update, folks! Re: wine list. Would love to see Sainte-Famille on the list. It seems that most house reds in town are Jost, and generally lack a variety of local wines.
ReplyDelete